
If you are new in blogger and would like to create Read more tag in your article or blogpost then you can use Insert jump break easily, but before you can do this make sure that you are using the new post editor.
To check or change your post editor here is what you need to do
Go to your blogger blog or log into your blogger account then click Settings

Click Basic and scroll down your page until you reach Global Settings

Select post Editor and choose Updated editor (Recommended) and Save Settings .
Now you have updated your Editor and can use the Insert jump break in your articles or blogpost.

First, decide where in the post you want to create the jump break, and place your cursor in that position
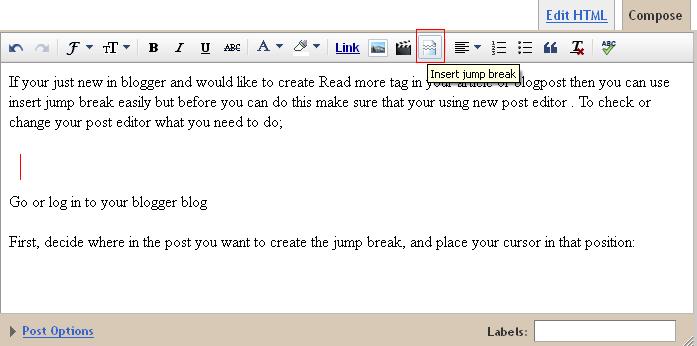
Once your mouse cursor is placed at the jump point, simply click the Insert Jump Break toolbar icon:

Clicking the icon will insert a grey bar at the cursor point, illustrating where in the post your break will appear. The bar can be dragged though, so you can always re-position it after insertion .

After publishing, you will notice that the Read More link is placed where you set the jump break:

No comments:
Post a Comment